Building a Hellcat-powered ‘57 International Metro van with Artec Leo
Challenge:To significantly expedite and simplify the process of building discontinued automotive parts and components from scratch, without compromising on quality and precision.
Solution:Artec Leo, Artec Studio, Autodesk Alias, SOLIDWORKS
Result:Reducing the time needed from days to just a few hours, from old physical parts to brand new CAD models, ready for manufacturing or prototyping, using scan data from Artec Leo as a reference.
Why Artec:Leo offers Scratch Build freedom that no other option has been able to provide. With reduced hours spent capturing data, more time can be spent on CAD modeling, designing, and prototyping.
Background
From the time he was five, Chad Forward knew he wanted to build things. After 15 years of working in leading automotive design studios in Australia and design consulting for custom automotive shops, he started his own restoration business,Scratch Build Co, to continue doing what he always loved – building cars.
Launched in 2012 as a side project that Forward devoted himself to on weekends, Scratch Build is now a full-time design studio and collaborative space. There, Forward and his fellow subcontractors – automotive designers, technicians, and electricians – work on creating design solutions for aftermarket creators of automotive products or custom-built cars.
“I was always attracted to people who are excited about what they try to create,” said Forward. “By observing incredible craftspeople and amazing designers in Toyota, Ford, and other design studios, I really saw the opportunity to employ those people and build a space where everyone can come and create something for the benefit of the Australian auto market.”
As the name suggests, a lot of what Forward is doing entails building things from scratch, be it a part that can’t be bought anymore, or an entire process that a client is trying to reinvent. Until 2017, his typical reverse engineering workflow would take a great deal of time, without the results to show for it. “Sometimes it would take me a whole day to measure up a chassis, getting really basic measurements, and then trying to model from that information in CAD”, added Forward. “Often, because of taking everything on so quickly, I missed something that was fairly critical. And it involved going back and forth a number of times as well.”
“Artec’s cutting-edge and truly portable Leo scanner is a massive breakthrough in the 3D scanning industry.”
When Artec released itswireless handheld 3D scanner Artec Leothat year, Forward was immediately on board. “20 years ago when I had my first custom-car business, I thought this technology would never exist in my lifetime,” he said. Forward pre-ordered the scanner through Artec’s Australian reseller,Objective3D, and, according to the team, was the first lucky customer to get it at that time.
“Artec’s cutting-edge and truly portable Leo scanner is a massive breakthrough in the 3D scanning industry, and we at Objective3D are proud to bring this technology to the Australian and New Zealand market,” said Matt Minio, Managing Director of Objective3D. “It’s especially beneficial for automotive engineers who can use it toreverse engineer partsand see how they affect the performance of a vehicle.”
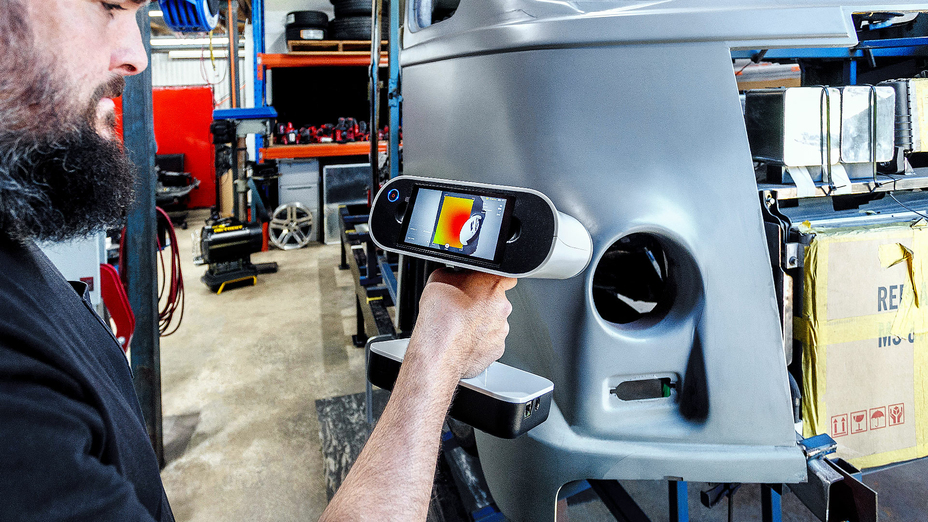
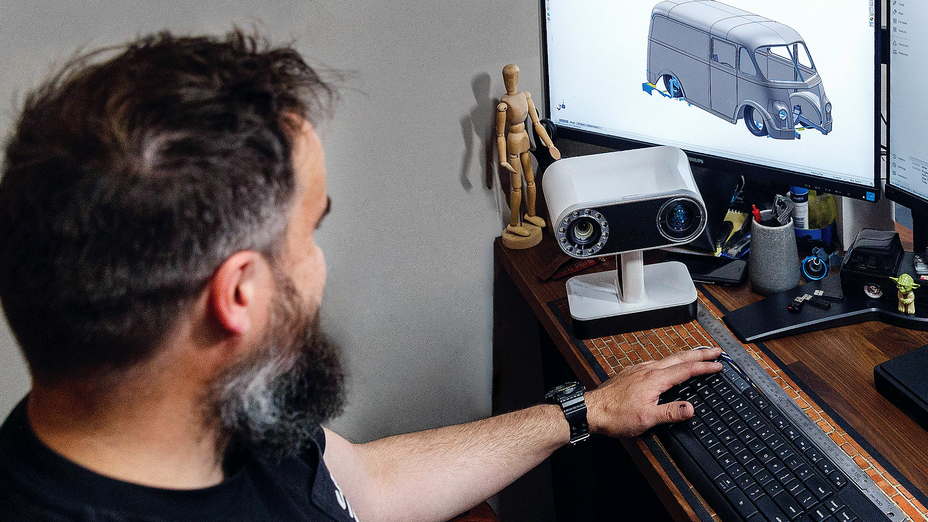
Artec Leo enables the founder of Scratch Build to measure any part simply (Image by streetmachine.com.au)
Designed with both mobility and ease of use in mind, Artec Leo is a powerful and one-of-a-kind 3D scanner that doesn’t need a PC or laptop to work with. An extensive field of view allows the scanner to easily snap both medium to large industrial parts, or entire vehicles in 3D, with quality-assured accuracy and exceptional resolution.
Powered by automatic onboard processing, wireless connectivity, inbuilt touch screen, and battery, the scanner provides full autonomy and freedom of movement wherever the user is, be it a custom car shop, a factory floor, or a far remote location with no power access.
For Forward, it was a no-brainer: “It took me four years to convince myself I needed to spend $4,000 on a 3D printer, but it took me 15 minutes to convince myself to buy a $40K scanner.”
Getting to work
Once the scanner arrived, Forward put it straight into work, and hasn’t stopped since: anything that needs to be measured car-wise now gets scanned with Leo, onsite in the shop or out in the field, saving him and his clients precious time. He now spends those free hours on CAD modeling, designing, and prototyping car parts and components, using the data he scans as a reference.
“The freedom that this single machine has offered me is unbelievable. Regardless of the location or parts’ complexity, I’m now able to capture the data simply,” Forward added.
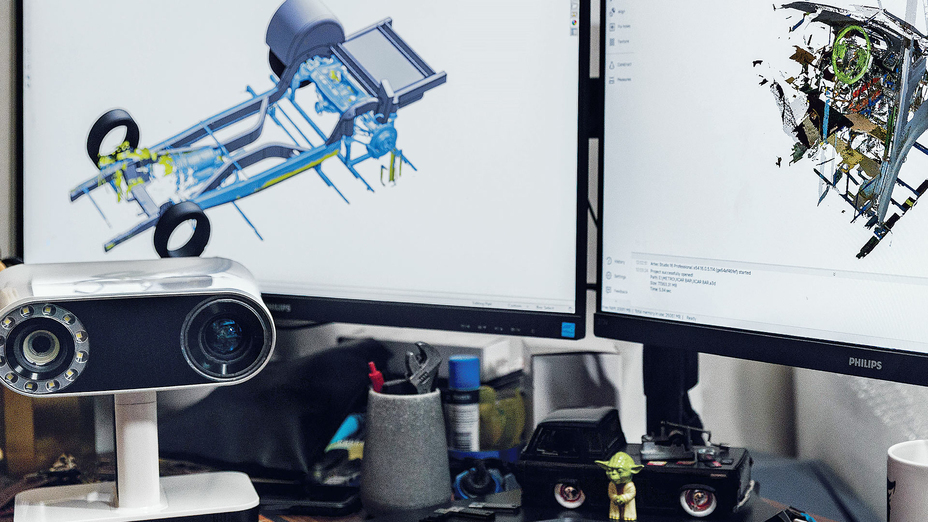
Forward uses data from Leo as a reference for CAD modeling in SOLIDWORKS and Autodesk Alias (Image by streetmachine.com.au)
The typical workflow looks like this: Forward or one of his design colleagues drives to the client and scans whatever needs to be scanned, then all the data gets transferred to one of their desktop computers, which is set up solely for processing inArtec Studio.
“I have two desktop computers: one for processing all the scanned data and the second one for the CAD modeling. I always have things going on, so I prefer to run them in parallel,” Forward explained. Depending on the part scanned, he then loads it into either SOLIDWORKS or Autodesk Alias to create a solid CAD model.
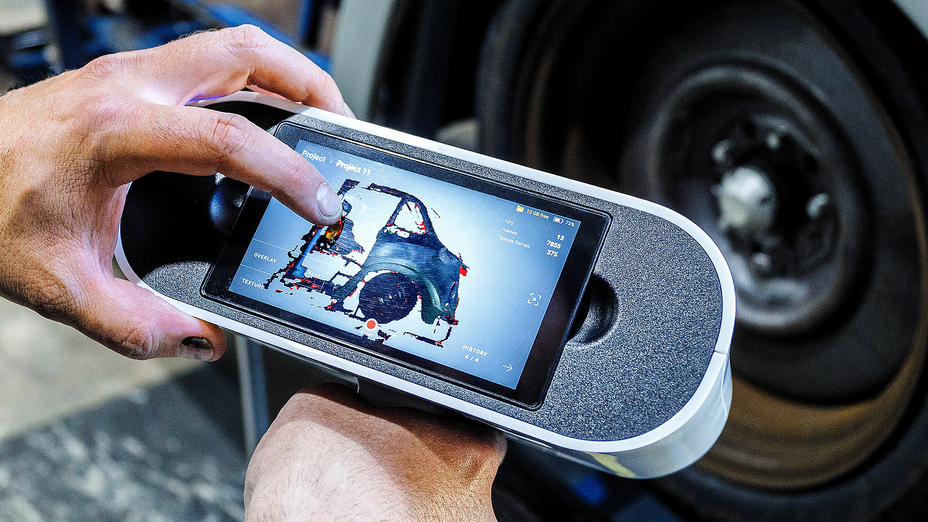
Artec Leo’s built-in display allows Forward to preview the results of his scan in real-time (Image by streetmachine.com.au)
Using a 3D scanner at the clients’ locations has also brought Forward new opportunities work-wise: “Every time I take Leo out somewhere, I am almost guaranteed to pick up another job from just visiting one place. One place will send me to another place, and so on,” he shared. While on site, he also collects more data than he needs to – building his own catalog of sorts, gathering valuable data from parts that can no longer be found.
The 1957’s International Metro Van
One of the biggest projects where Forward has been able to make full use of the scanner so far is the 1957 International Metro Step Van that he and his business partner from another automotive shop, Luke Williams, are on a mission to restore from the ground up by the end of 2023.
The owner of the van didn’t just want to renovate the vehicle as is, but pair its vintage exterior with the power of a sports car, featuring the supercharged 6.2L HEMI Hellcat V8 engine.
Coming standard on the Dodge Challenger SRT® Hellcat models, today’s most powerful modern American muscle cars, the V8 boasts more than 700 horsepower, which, unlike the van’s original engine, will allow the owner to freely drive his van all across the country. Apart from the engine, he also wanted to tune up the design, so the van looked less “puffy,” as well as retain all the factory electronics.
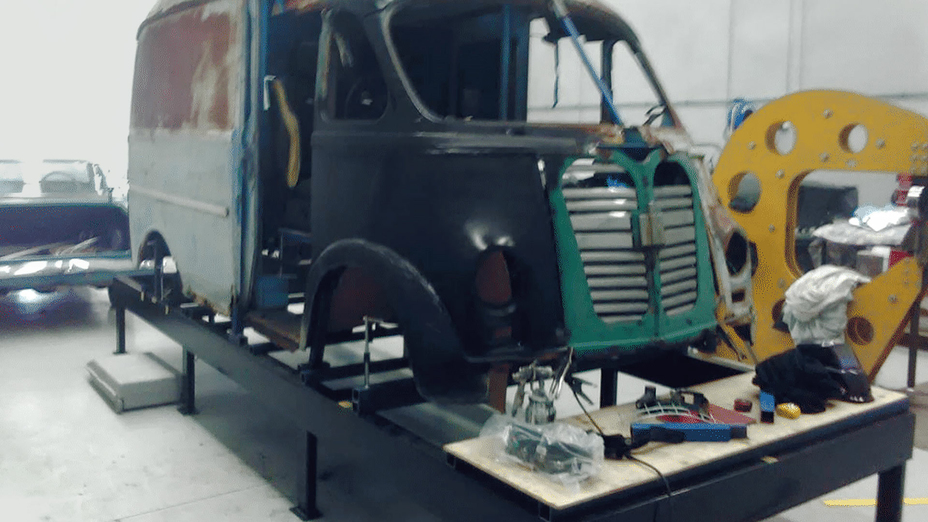
Original body of the 1957 Metro Van before the restoration (Image by Chad Forward)
After collecting the design and engineering requirements from the owner and making some preliminary sketches, Forward and Williams came up with a plan: since the van’s body was too worn out and rusty to restore, it would be faster to build the entire vehicle completely from scratch, using the scans of the older and modified parts as a base for modeling new parts in CAD.
Step 1. Sculpting the body
The first step: to cut up and sculpt the body. The plan was to modify an existing body – or one of its parts – to the desired shape, then 3D scan this part and use the data as a starting point for modeling an entire body in CAD.
In order to do that, Williams cut up a factory body with an angle grinder, welded it back in slightly different positions, and then used a lot of body filler and primer to create a matte surface that he was happy with.
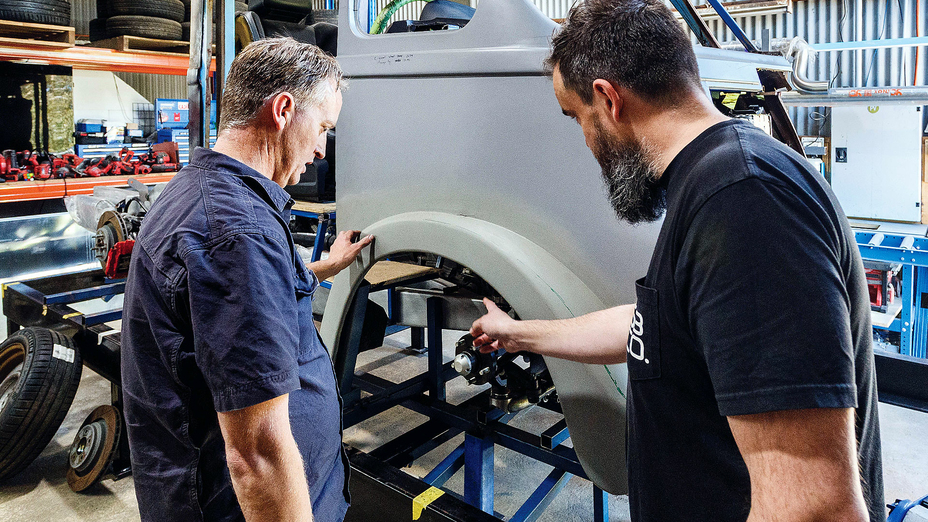
The plan was to modify one of the body parts to the desired shape, and then 3D scan this part for modeling an entire body in CAD (Image by streetmachine.com.au)
Step 2. Building the chassis
In the meantime, Forward set up all the drivetrain components of the Dodge Hellcat – the engine, all the wiring, the front and rear suspension – on a base platform that he built around the chassis. He wanted to see how all the components fit together, if they met ADR (Australian Design Rules) standards, and scan them to see which new chassis parts needed to be modeled in CAD.
Step 3. 3D scanning
Then it was time for Forward to scan the primed front left corner of the van, as well as the chassis and other internal components, using his Artec Leo. All the scanning just took a few minutes; he then uploaded all the data to Artec Studio for processing and creating an .STL file.
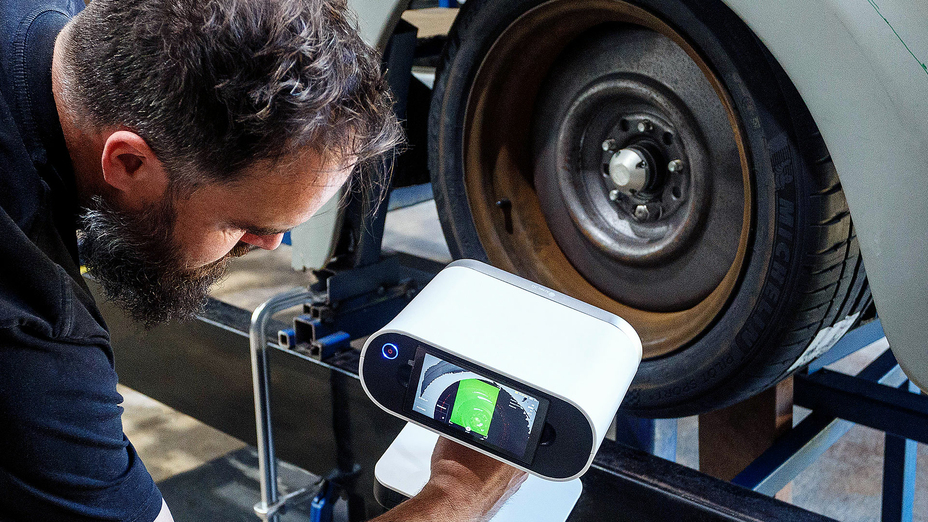
Forward scanning the van with Artec Leo (Image by streetmachine.com.au)
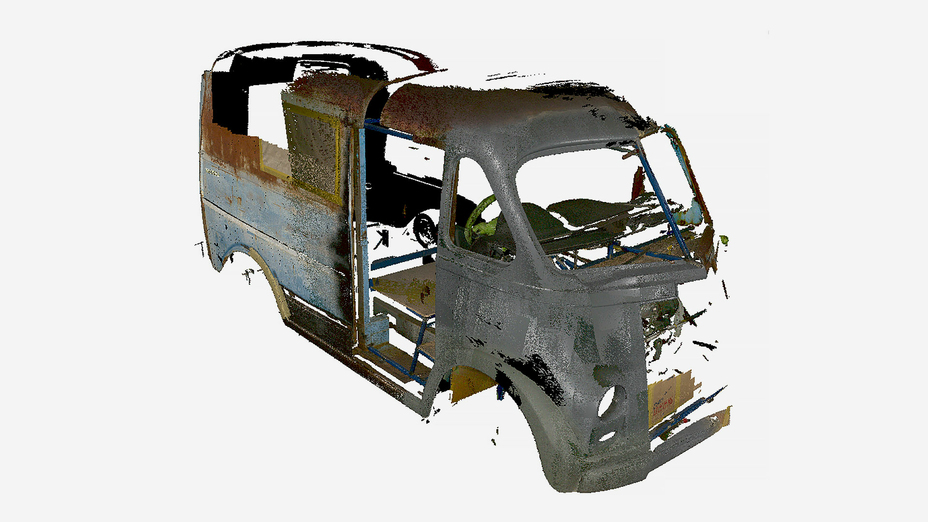
3D scan of a modified body, captured with Artec Leo
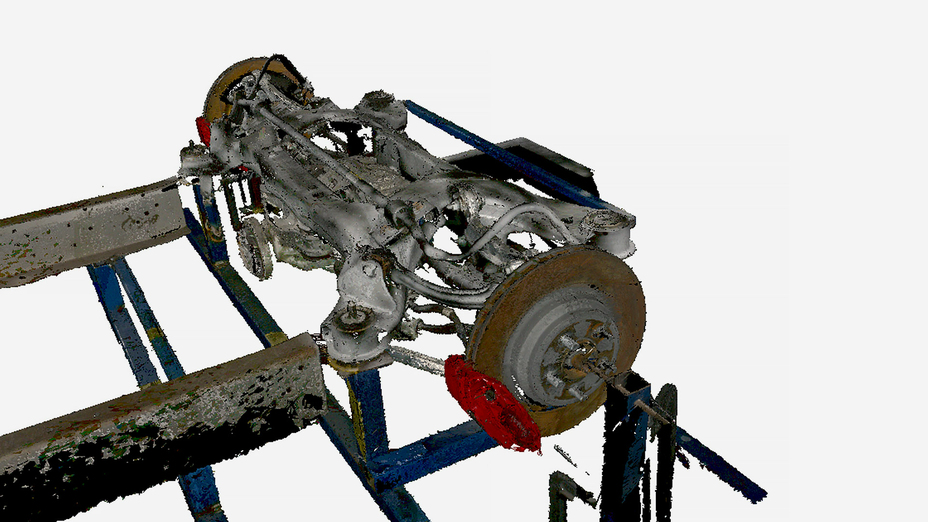
3D scan of a rear suspension
Step 4. Modeling the van’s body
Next: To model the body surface. For that, Forward imported the scan data from Artec Studio into Autodesk Alias, computer-aided industrial design software for automotive exteriors, and used this data as the blueprint to create the sketches of a future body surface.
Forward uses Autodesk Alias software to create car body surfaces from the sketches that he makes over the top of the scanned data (Image by streetmachine.com.au)
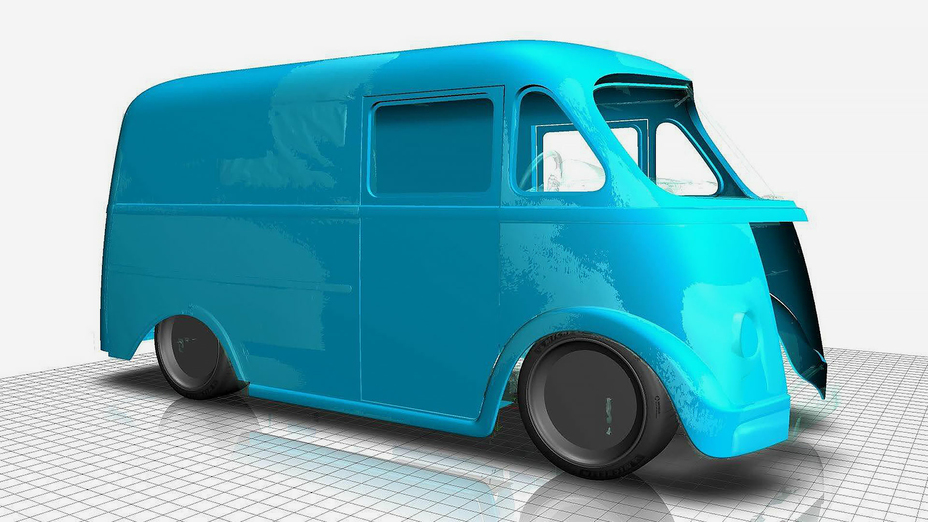
3D scan (light blue) and CAD data (blue) in Alias software
Step 5. Modeling the chassis
For modeling the chassis and all the other engineering parts, Forward uses SOLIDWORKS. Following the same workflow, he uploaded the scan data captured with Leo into SW and modeled the new parts around it. Having accurate 3D replicas of the internal components allows Forward to use them as precise references during his design process, and also have a clearer understanding of what issues he may run into. As he progresses through his design, he scans more components, and adds them to the software as reference models.
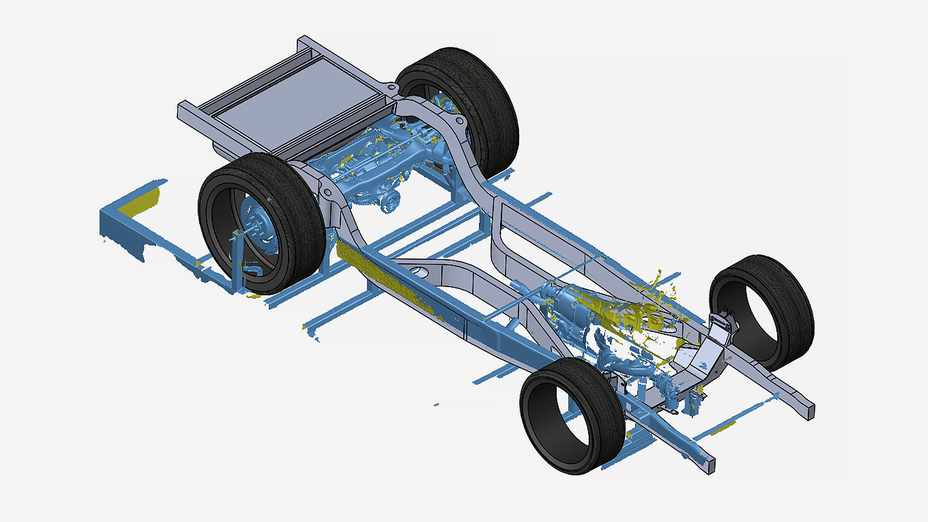
Forward uses the scan of the chassis to be modeled as a platform to create a CAD model in SOLIDWORKS
Step 6. Laser cutting & welding the new components
After the SOLIDWORKS stage, Forward sent all the CAD components for laser cutting, and then welding to the chassis.
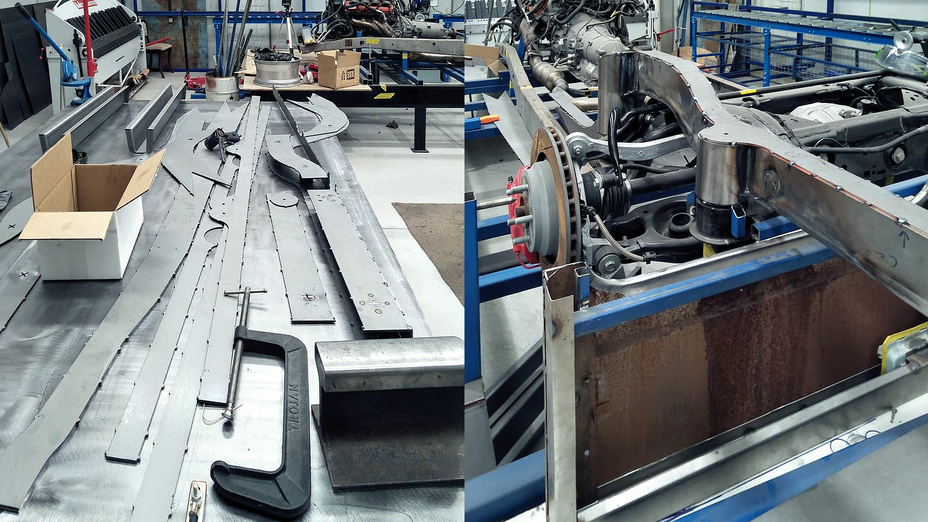
Laser-cut flat parts loosely tapped together before final welding to the chassis (Image by streetmachine.com.au)
After welding all the chassis components, the whole internal build was sent to an auto electrician to get the chassis up and running with all the Hellcat’s original components. As this was taking place, Forward was preparing to cut up the body surface modeled from the scan data (in Step 4) to build an auto body buck that could then be used for fabricating the panels and test fitting.
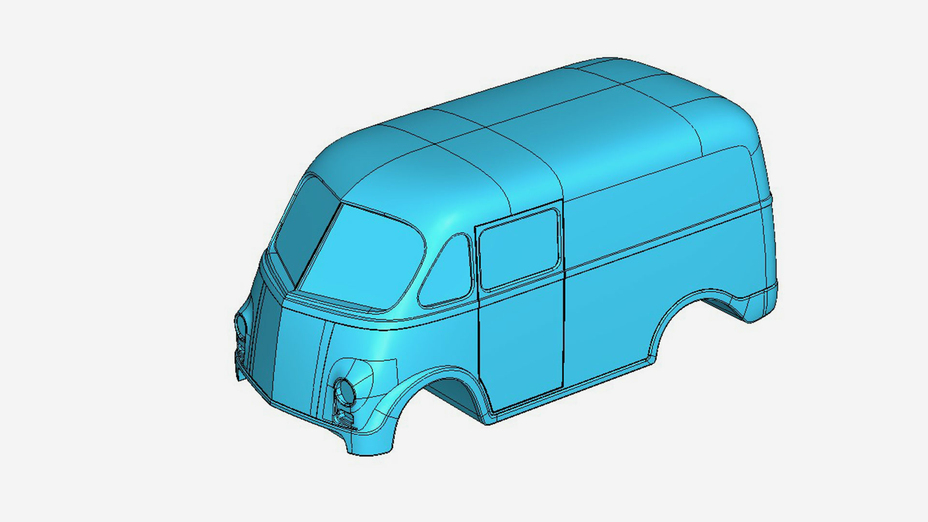
The final design of the new body style that Forward will use to create the body buck
The team expects to finish all the body work in the next 12 months, having given themselves another few months to work on the interior, painting, and other smaller tasks by the end of 2023. Once complete, Forward hopes this project will become a good platform to educate other studios and clients.
“Metro Van is a great example of how I think all cars should be recreated,” said Forward. “Although our process takes time, it will take way longer to restore the old car as is, than to build it from scratch backed by the data from a 3D scanner. Being able to capture information in 3D, reverse engineer and make components based around what I’ve captured – that is what I fundamentally set up this business for.”
“As soon as HD Mode was available, it absolutely blew my mind – it’s like I bought a new scanner.”
Since Forward has switched to 3D scanning, he has never looked back. Being able tocreate exact digital copies of automotive partsinstead of measuring them by hand has been a massive game-changer in the way he works, the accuracy of the data he collects, and his overall productivity.
And it’s only getting better. “I have always been amazed with the workflow and the continued upgrade of everything that Artec has done to stay ahead of the curve,” he said. “Every time the product re-opens, it’s like a whole new level of excitement for me. The difference between Artec Studio 15 and 16 is absolutely massive – as soon as HD Mode was available, it absolutely blew my mind, it’s like I bought a new scanner.”


