ZEISS INSPECT Optical 3D
Don’t compromise on quality. Accurately scan any object with Artec 3D devices for best-in-class ZEISS INSPECT Optical 3D analysis.


Get products to market faster
Use ZEISS INSPECT Optical 3D’s best-in-class GD&T toolset to rapidly iterate upon designs, ensure they meet ISO & ASME standards, and get products to customers as quickly as possible.
Maximize machine uptime
Don’t wait for parts to fail. Stay on top of their upkeep with precision digitization and inspection to preempt failures and keep your workflow moving.
Boost productivity with Python
Harness Python scripting to customize your inspection workflow and create templates that can automatically be applied to accelerate repeat production runs.
Industrial-grade inspection with best-in-class results
Analyze with unmatched pace and precision using ZEISS INSPECT Optical 3D: the industry-standard inspection software.
Improve inspection reliability
ZEISS INSPECT Optical 3D is built on a parametric concept that saves each project step, so you can create templates with multiple inspections like UDIPs to tackle repetitive tasks.
Analyze deviations instantly
Instantly compare meshes to CAD data to identify simple surface deviations or analyze GD&T with intuitive color mapping, before making design changes with advanced editing tools.
Ensure parts fit digitally
Before you even consider installing parts physically, model how they’ll slot into existing setups with digital assemblies, to ensure perfect fit, reduce waste, and increase efficiency.
Real-time project guidance
ZEISS INSPECT Optical 3D actively guides users throughout the complete inspection workflow – helping to detect issues like calculation errors and overcome project hurdles with timely workarounds.
Share QC findings instantly
With ZEISS INSPECT Optical 3D’s advanced reporting module, you can share entire projects or exchange insights to rapidly action results via traditional reports or fully animated PDFs.
‘Close the gap’ on curved parts
Close the gap between point and surface-based inspection with ZEISS INSPECT Optical 3D. Visualize properties, measure curve edge radii, and analyze products with problematic geometries like arches in-depth.
Identify deformations with ease
In ZEISS INSPECT Optical 3D, deformations are represented in an exaggerated form, making it far easier to analyze bulges, dents, and slots in parts like bodywork in aerospace or automotive.
Inspect in real-life scenarios
Analyze CAD models using incredibly lifelike renders, complete with indoor and outdoor lighting as well as shadow effects, to get a better idea of how they’ll look in the real world.
Get feature-based CAD models
Simplify the process of converting precisely captured scan data into solid CAD models for analysis, simulation, 3D printing, and more with the ZEISS INSPECT Optical 3D auto-surfacing app.
An all-in-one metrology toolkit at your fingertips
Tailor ZEISS INSPECT Optical 3D to meet your needs, or pair it with other metrology solutions, via the ZEISS Quality Suite.
Clamp hang-on parts virtually
With the virtual clamping app, you no longer need to measure by mounting to fixtures. Ideal for analyzing vehicle paneling, ZEISS INSPECT Optical 3D compensates for gravity deflection, simulates intended mounting position, and identifies deviations with minimal human input.
De-warp plastics for analysis
Virtually compensate for plastic warpage and shrinkage to compare injection molds to CAD models and assess whether they meet required tolerances using a dedicated de-warping app.
Easily get from scan-to-CAD
Seamlessly convert scan data into high-precision CAD models for simulation, further modeling, or manufacture with ZEISS’ dedicated auto-surfacing app.
*ZEISS Quality Suite apps do not come as standard and must be downloaded separately. For more information about the ZEISS Quality Suite, please visit our FAQ below.
Why use ZEISS INSPECT Optical 3D with Artec scanners?
Rapid, sub-millimeter accuracy Artec 3D scans deliver the perfect dataset for uncovering design flaws.

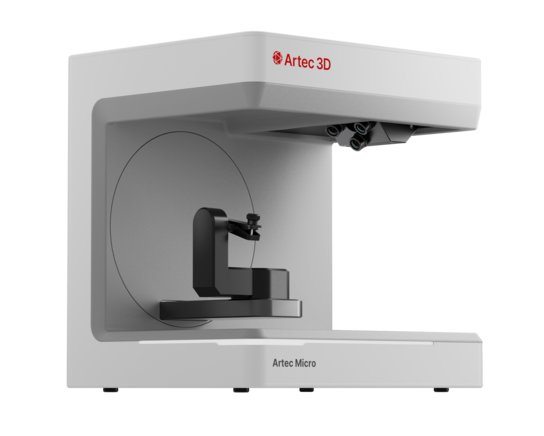
A metrology-grade 5-micron accuracy desktop 3D scanner and automated, one-click solution.
| Scanner type | Desktop |
|
Object size
Typical object sizes:
XS: <5 cm S: 5–20 cm M: 20–50 cm L: 50–200 cm XL: >200 cm |
S, XS |
| Accuracy | 0.005 mm |
| Resolution | 40 microns |

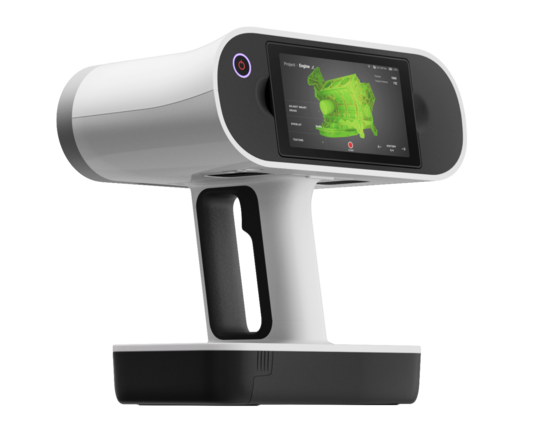
User-friendly portable laser 3D scanner with an inbuilt touchscreen and intuitive UI for easy 3D scanning.
| Scanner type | Handheld |
|
Object size
Typical object sizes:
XS: <5 cm S: 5–20 cm M: 20–50 cm L: 50–200 cm XL: >200 cm |
M, L |
| Accuracy | up to 0.1 mm |
| Resolution | up to 0.2 mm |

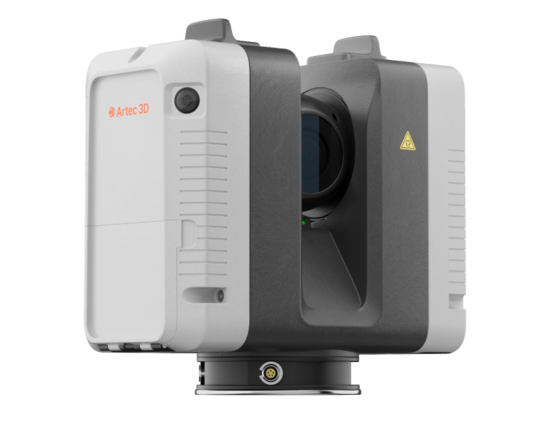
Powerful long-range laser 3D scanner for precise capture of massive objects and scenes with remarkable speed and high accuracy.
| Scanner type | Long-range |
|
Object size
Typical object sizes:
XS: <5 cm S: 5–20 cm M: 20–50 cm L: 50–200 cm XL: >200 cm |
L, XL |
| 3D point accuracy, up to | 1.9 mm @ 10 m |
| Resolution | 3 / 6 / 12 mm @ 10 m |
Inspect without limits
With Artec 3D scanning, no object or area is too small or large. Rapidly scan on the go with Artec Leo, digitize at a microscale with Micro II, or capture facilities using Ray II, then analyze data on ZEISS INSPECT Optical 3D.
Embrace target-free capture
Artec 3D scanning is as simple as firing up your device, pointing, and scanning. There’s no need for positioning targets or reference spheres, so you can start capturing straight away.
Metrology-grade accuracy
Analyze based on the best possible data, by digitizing with up-to-5-micron accuracy Artec 3D scanning, and checking for deviations with a market leader in ZEISS INSPECT Optical 3D.
Uncover defects faster
Artec 3D scanners are the fastest on the market, allowing you to digitize faulty products in seconds, identify defects, and fix design flaws or arrange repairs at pace.
Digitize your inspection workflow
Looking to upgrade your CMM probe-based inspection process? Requiring less than two hours’ training to operate, Artec 3D scanners offer the ideal click-to-scan replacement.
Seamlessly import scan data
As ZEISS INSPECT Optical 3D supports file formats like IGES, STL & PLY, importing highly accurate meshes from Artec Studio is seamless, with no tedious conversion needed.
Your in-depth digitization & analysis workflow
Simply use Artec 3D scanning and export to ZEISS INSPECT Optical 3D for rapid, reliable inspection results.
Digitize any object & process data
Rapidly, accurately scan anything from tiny parts to huge assemblies and process resulting data for analysis.
Scan with Eva, Point, Spider II, Micro II, or Ray II
Connect your scanner to Artec Studio and digitize your object of choice, using real-time feedback to ensure complete data capture.
Or scan & share data with Leo
Scan with the wireless Artec Leo for unique versatility and the ability to send data straight to Artec Studio for processing.
Optimize mesh data in Artec Studio
Quickly, easily tidy up mesh data as required with advanced algorithms and a suite of manual and automated editing tools.
Ramp up product analysis
Import any point cloud, model, or mesh to ZEISS INSPECT Optical 3D, send multiple datasets for assembly analysis, and use presets to accelerate the process.
Create mesh-CAD alignments
With mesh-CAD alignments that adjust as you make changes, you can compare surfaces, sections, or patches to find deviations and check tolerances.
Carry out in-depth inspection
Utilize more advanced alignments like local best fits to inspect critical features and harness ZEISS INSPECT Optical 3D’s clipping to see into obscured areas.
Deploy advanced GD&T tools
An all-in-one Quick Creations panel allows you to create base elements and datum systems for advanced curve, tolerance, and dimensional analysis – even without CAD data.
Correlate and share results
Seamlessly turn findings into outcomes that deliver positive change on the factory floor.
Drag & drop reporting
Report results using templates or drag and drop content into place to create custom designs, inserting workspace data or models as you need to.
Present results interactively
Harness a built-in presentation mode to move, scale, and edit reports in a 3D viewer to make findings easy to understand and deliver interactive demos.
Have a question about using ZEISS INSPECT Optical 3D with Artec scanners?
-
Is ZEISS INSPECT Optical 3D the same as GOM Inspect?
GOM Inspect was rebranded ZEISS INSPECT in 2023. ZEISS INSPECT software offers the same advanced feature set as before, only it’s marketed in variants such as Optical 3D, so users can select the version that best meets their exact needs.
-
Are there any limitations to using Artec 3D scanning with ZEISS software?
No! ZEISS INSPECT Optical 3D is compatible with the entire current Artec 3D scanner range: Micro II, Spider II, Point, Eva, Leo, and Ray II, as well as any Artec Studio-exported 3D mesh.
-
Why should I adopt ZEISS INSPECT Optical 3D over similar programs?
ZEISS INSPECT Optical 3D provides you with a unique Python scripting-equipped toolset for rapidly analyzing parts and getting ironclad inspection results. Also, unlike other programs, it’s based on a parametric concept that remembers workflow steps and unlocks automation opportunities.
-
How do I access ZEISS INSPECT Optical 3D?
Simply contact us and we’ll get you set up. Once you’ve acquired a license, we’ll supply you with everything needed to access your software via the ZEISS Quality Suite.
-
Can I try ZEISS INSPECT Optical 3D first?
Sure! All you need to do is contact us, and we’ll guide you through your options.
-
Is there an Artec and ZEISS Education Package?
Yes. We offer a few special bundles of Artec 3D scanners and ZEISS software at discounted rates for educational and research applications. For more information, please contact us at sales@artec3d.com.
-
How do I use a 3D scanner with ZEISS INSPECT Optical 3D?
Above, we’ve outlined the basic inspection workflow. For more information, users can find a wealth of resources including tutorials and related forums on the ZEISS Quality Suite.
